The Ultimate Guide to Tuning Your Bow for Peak Performance

When it comes to bowhunting, a well-tuned bow can make all the difference between a perfect shot and a frustrating miss. Tuning isn’t just about adjusting your bow; it’s about building trust between you and your equipment. Whether you’re fine-tuning for accuracy or making sure your arrows fly true, this guide will walk you through the essentials of bow tuning.


Step 1: Start with the Basics

Before diving into tuning, make sure your bow is in good working condition. Inspect your bow for any signs of wear and tear. Check the strings, cables, and cams for fraying, dirt, or damage. A clean and maintained bow is much easier to tune.

  • Pro Tip: Replace your bowstrings every 1-2 years, depending on how often you shoot. Fresh strings ensure consistent performance.

Step 2: Adjust Your Draw Length and Weight

A bow that doesn’t match your draw length or strength won’t perform at its best.

  • Draw Length: Your draw length should feel natural and allow for a consistent anchor point. Adjust it using the modules on your bow’s cams or seek help from a professional if unsure.
  • Draw Weight: Set your draw weight to something you can comfortably pull without straining. Too heavy, and your form will suffer; too light, and you’ll lack power.

Step 3: Paper Tuning for Arrow Flight

Paper tuning is a quick way to assess how well your arrows are leaving the bow. Here’s how to do it:

  1. Set Up: Hang a piece of paper 4-6 feet in front of a target.
  2. Shoot: Stand about 6 feet away and shoot an arrow through the paper.
  3. Analyze the Tear:
    • A bullet hole with three evenly spaced tears indicates perfect alignment.
    • A high, low, left, or right tear means your nocking point or rest needs adjustment.
  • Fix It: Adjust the arrow rest or nocking point until you achieve a clean tear.

Step 4: Check Cam Timing

Proper cam timing ensures both cams rotate in sync, delivering consistent energy to your arrow. Use a bow press to check the timing marks on your cams. If they’re off, adjust the cables to bring them back into alignment.

  • Pro Tip: A chronograph can help measure your bow’s speed to confirm you’re not losing efficiency due to mistimed cams.

Step 5: Broadhead Tuning

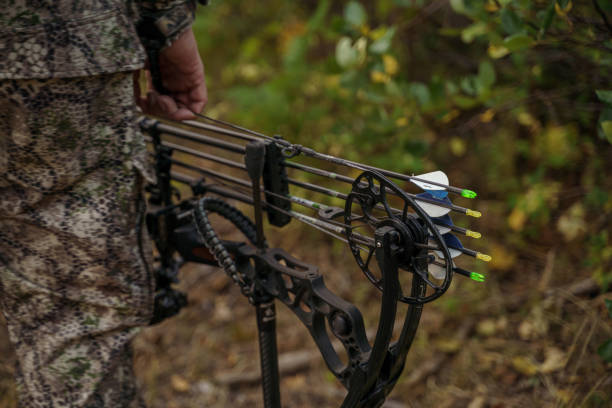
Field points and broadheads don’t always fly the same. Broadhead tuning ensures your hunting arrows hit where you aim.

  1. Shoot Field Points and Broadheads: Compare their impact points.
  2. Adjust Arrow Rest: Move the rest slightly to correct any discrepancies. Small changes can make a big difference.
  3. Fine-Tune: Repeat until both hit the same spot.

Step 6: Stabilizer and Sight Adjustments

Stabilizers and sights can improve accuracy, but they need proper setup.

  • Stabilizers: Add weight to counterbalance your bow and reduce vibration. Adjust until the bow feels steady in your hand.
  • Sight: Set your sight pins for your preferred distances. Start with the closest pin and work your way out.

Step 7: Practice to Perfect

Once your bow is tuned, practice is key. Regular shooting sessions will help you build muscle memory and confidence in your setup. Keep an eye on your bow’s condition and retune as needed, especially after heavy use or significant changes like new strings.


Tuning your bow might seem like a detailed process, but it’s well worth the effort. A properly tuned bow not only improves your accuracy but also boosts your confidence in the field. Take your time, follow these steps, and you’ll be ready for your next hunt with a bow that performs at its best.

Happy hunting! 🏹

Gabe Galindo
Gabe Galindo

Hi, I'm Gabe Galindo, a passionate hunter and outdoor enthusiast. For me, hunting is more than a hobby; it's a profound connection with nature. I cherish the serenity of the wilderness and hold deep respect for the wildlife I pursue. Sharing this reverence, I enjoy helping others discover the beauty of the outdoors, believing that our community thrives when we support each other. Thanks for visiting, and happy hunting! 🏹